

The fly from Umpqua doesn’t even look like the same pattern does it?
By contrast, Rim’s RS2 is segmented, lifelike and color matched to the insects in the stream. Rim has never sold his patterns commercially and Umpqua and the many other nationwide merchants selling flies with his name of RS2 on them, have never paid him a royalty. But Rim says, imitation is the best form of flattery.
For detailed video instructions of Rim Chung tying the RS2 fly, they are best shown by my friend, Ferenc, at www.rs2fly.com or download a .pdf file Tying-the-RS2.
One question we frequently get is tips on tying in the tails. You have to unspin the thread, by spinning the bobbin a couple times counterclockwise. Then, it is easier to tie in the first microfibbet on the close side and the other one on the far side (and by untwisting the thread, it keeps the microfibbets from spinning around the hook more). Use the first two wraps to gently place the fiber in place. If you pull too hard, it spins around. Use your fingernails to push them back into place as you wrap towards the tail but if you hold them on the sides, it generally stays in place. Then use one wrap behind and one in front to split the tails. I don’t find the need to use the forceps to shorten the tails as Rim does, I just tie them in at the correct length to begin with, though it is somewhat easier Rim’s way with tying in them longer and the shortening them to the correct length with forceps on size 26-30 flies, but I don’t see the need for larger flies.

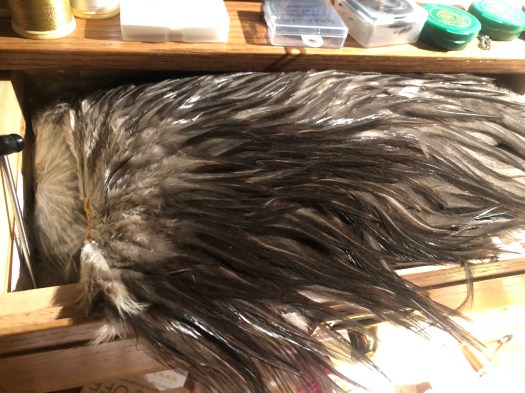
Photo sharing courtesy of Ferenc Horvath from www.rs2fly.com.
 Tie first tail in on your side of the shank. The length of the tail should equal the length of the shank. Two turns of the thread will secure tail in place. With smaller flies the tails should be tied on sooner (i.e. closer to the eye of the hook) to make sure that they’re adequately secured.

When applying dubbing to the thread use long fibers (this helps avoid a lumpy body). Make fibers line up with the thread. Closer to the hook the dubbing should be tapered thin to achieve a tapered fly body. The top (tapered) portion of the dubbing should be twisted clock-wise around the thread, then with a single turn secured to the shank. Once the dubbing is pinched between the shank and the thread, the remaining dubbing must be twisted counter clock-wise onto the thread as tightly as possible. The dubbing should not come loose since the first turn secured it to the shank. While keeping the twisted dubbing tight wrap under the tails one more time.

As you wrap dubbing (without overlapping) toward the thorax portion of the fly, the body should be tapered. It should be slightly thicker near the thorax. The tightly twisted dubbing will create a body that has a segmented look to it and it also makes the fly more durable.

Trim the feathers closer to the eye of the hook.

Cut the wing by pinching and lifting the feathers straight up and inserting the scissors approaching from the tail end of the fly at an angle.
Create a well pronounced thorax by wrapping dubbing in front of and behind the wing. The thorax can be made to look smoother by twisting the dubbing less tightly around the thread. Additional turns of the thread (without dubbing) will make the thorax more durable. Tie off thread near the eye of the hook.The old RS2 Home Page allows the above images to be clicked for detail. You can [view a separate page on this site] for clickable images. Alternatively, [click here for the original tying page.]
Materials used for tying RS2 flies
- • Hook: Tiemco 101 (straight-eye) hooks.
- • Tail: Dark dun colored microfibett.
- • Thread: Unithread 6/0 for hook sizes 14 or larger; Unithread 8/0 for smaller hooks.
- • Dubbing: Natural or dyed beaver fur. Longer fibers preferred, preferably at least 1/2” long. (Note: Rim uses no dubbing wax.
Instead, he uses a bit of saliva, basically licking the tip of his finger lightly, while applying the dubbing, then twisting it into a rope before wrapping.) - • Wing: Web of saddle hackle feathers in dark dun color (the fluff at the base of the stem of a saddle hackle).
Photographs above of tying by Ray Pong and Bill Cronin (Cronin Photography, Denver).
The above color combinations have been known to work well. Other color combinations may also do well in your area. When tying bicolor flies, tie off thread after you secured the wing. The size and color of the flies vary from season to season as well as geographic region. For instructions on dying natural beaver pelts, which can be grey or light brown naturally, when unable find colors of pre-dyed long-haired beaver on the pelt, Rim and I have followed these instuctions: Dying Beaver Fur for Fly Tying. Or you can ask your wife’s hairdresser to do, which I have done as well, and is much easier.


This tying page is available in PDF for printing here: Tying-the-RS2.pdf
Rim Chung Ties the RS2 Video ( shorter version ):
Rim Chung tying the RS2 Video ( longer version with more comments ) :
Copyright 2018, entire site, all rights reserved, no images or text may be reproduced or reposted in any fashion whatsoever without the express written permission of rimchungflyfish@gmail.com.
